
Canva has fundamentally transformed the way modern professionals, small business owners, and creators build graphics, presentations, documents, and videos. Where traditional graphic software often requires months of technical training, Canva’s intuitive drag-and-drop workspace makes clean design accessible to anyone in minutes.
However, opening a blank canvas for the first time—or staring at a complex template—can still feel overwhelming. With dozens of hidden context menus, brand integration features, dynamic chart tools, and a full-featured video timeline, knowing where each tool lives is essential to saving time and producing professional results.
If you are brand new to the platform, make sure you first review how to create a canva account and familiarize yourself with the canva dashboard overview. Once your workspace is ready, this comprehensive canva editor guide will walk you through every panel, toolbar, menu option, and design workflow you need to build stunning visual assets from scratch.
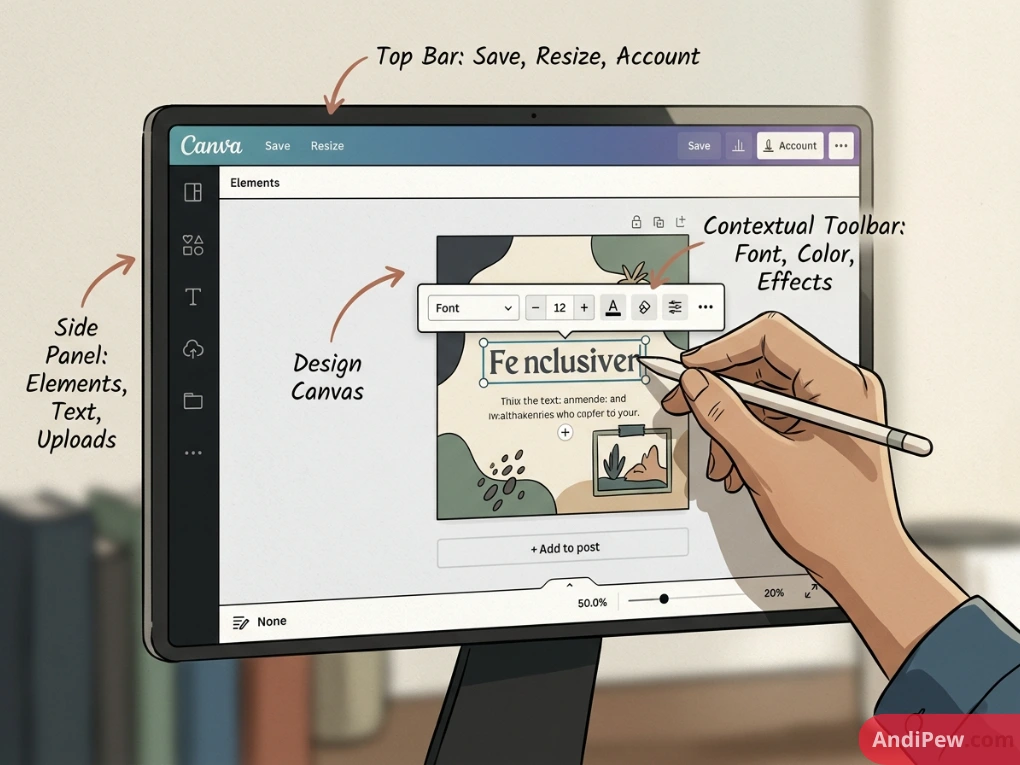
Understanding the Canva Workspace: The 4 Core Areas
Before diving into advanced layouts and edits, let’s break down the Canva editing screen into its four structural components. When you open any design, the interface is organized into predictable, easy-to-navigate regions.
+-------------------------------------------------------------------------+
| Top Menu Bar (Home | File | Resize & Magic Switch | Undo/Redo | Share)  |
+-------------------+-----------------------------------------------------+
| CANVA SIDE PANEL  | CONTEXTUAL TOOLBAR (Font, Color, Effects, Animate)  |
| - Design          +-----------------------------------------------------+
| - Elements        |                                                     |
| - Text            |                      CANVAS                         |
| - Brand           |              (Your Workspace Area)                  |
| - Uploads         |                                                     |
| - Draw / Projects |                                                     |
| - Apps            +-----------------------------------------------------+
|                   | BOTTOM BAR (Pages, Grid View, Notes, Zoom, Timeline)|
+-------------------+-----------------------------------------------------+
- The Top Menu Bar: Handles high-level document settings, file renaming, automated saving, version history, resizing options, and final exports via the Share button.
- The Canva Side Panel: Your primary resource hub. Located on the left side of your screen, this panel stores templates, graphic elements, typography presets, uploaded media, Brand Kits, drawing tools, and integrated third-party applications.
- The Contextual Toolbar: Floats horizontally directly above your canvas. This toolbar dynamically changes its available options depending entirely on what element you currently click on (text, vector shape, photo, table, chart, or video).
- The Canvas & Bottom Bar: The central design area where your visual assets are assembled, paired with bottom-edge controls for page additions, zoom sliders, presenter notes, and video timeline tracks.
Canva Menu Options & The Top Navigation Bar
The top horizontal menu bar manages administrative and global document settings. Understanding these controls ensures you never lose work and can navigate between projects seamlessly.
+---------------------------------------------------------------------------------------------------------+
| [Home]  [File]  [Resize & Magic Switch]  |  Document Title  |  [Cloud Status]  |  (Collab Avatars)  [Share] |
+---------------------------------------------------------------------------------------------------------+
1. Home and File Menus
- Home Button: Returns you to your main dashboard without closing your current design tab.
- File Menu: Contains essential project management tools:
-
-
Document Title: Rename your file directly from the top bar or inside this menu.
-
View Settings: Enable or disable rulers (
Shift + R), guides, margins, and print bleed lines. -
Version History: Restore earlier iterations of your work (available on Pro and Enterprise tiers).
-
Save to Folder: Organize your project into dedicated team or personal workspace folders.
-
Make a Copy: Duplicate your design to create reusable base templates.
-
2. Resize & Magic Switch
Located next to the File menu, this feature allows you to change canvas dimensions on the fly. You can convert a square social post into a vertical story format, a presentation deck, or a print-ready flyer without rebuilding assets from scratch. On premium plans, Magic Switch can also automatically translate text or convert visual boards into structured summaries.
3. Save Status and Collaboration Controls
- Cloud Icon: Displays your real-time saving status. Canva saves changes automatically to the cloud every few seconds.
- Collaborator Avatars: Displays team members currently viewing or editing the canvas alongside you.
- Share Button: Your export control center. Use this button to invite team collaborators, configure view/edit permissions, generate public view links, present directly, or download your final files.
Canva Side Panel: Your Design Asset Hub
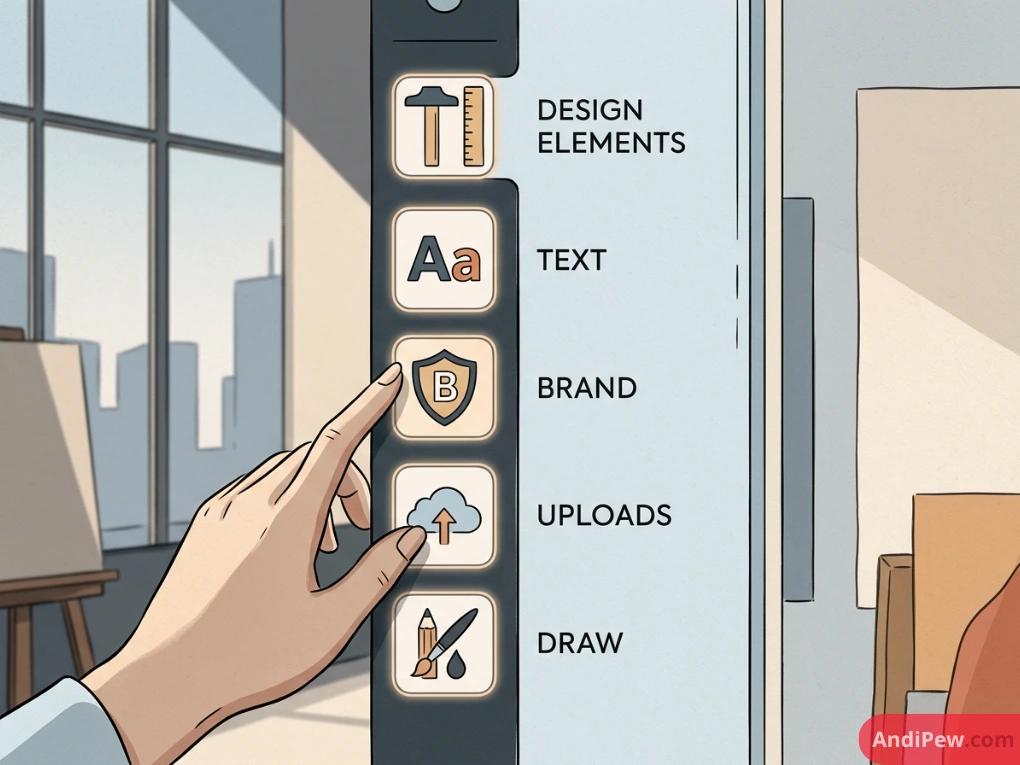
The vertical dock running down the left side of the workspace is the canva side panel. It functions as your creative drawer, holding millions of stock elements, design layouts, custom uploads, and typography pairings.
+----------------+-------------------------------------------------------+
| SIDE PANEL TAB | PRIMARY FUNCTION & TOOLS                              |
+----------------+-------------------------------------------------------+
| Design         | Search curated layout templates and style palettes.   |
| Elements       | Shapes, vectors, stock photos, charts, frames, grids. |
| Text           | Headings, body copy, curated font combination blocks. |
| Brand          | Logos, brand color palettes, fonts (Pro feature).     |
| Uploads        | Custom image, audio, and video file repository.       |
| Draw           | Freehand pens, markers, highlighters, stroke weights. |
| Projects       | Browse folders, starred assets, and previous designs. |
| Apps           | Third-party tools, AI generators, QR code creators.   |
+----------------+-------------------------------------------------------+
Deep Dive into Side Panel Tabs
- Design Tab: Houses thousands of premade layout concepts suited to your document’s exact dimensions. You can apply an entire multi-page design set or import single layout slides. You can also explore the Styles tab to apply cohesive color palettes and font pairings to your canvas with a single click.
- Elements Tab: The backbone of custom design. Search for vector graphics, geometric shapes, lines, stock photos, audio snippets, tables, frames, and video clips.
- Text Tab: Add blank text boxes with preset hierarchy (H1 Heading, H2 Subheading, Body Text) or choose from pre-formatted typography combinations with coordinated drop shadows, gradients, and pairings.
- Brand Hub: For users maintaining visual consistency across campaigns, this tab keeps official logos, hex code color swatches, custom fonts, and brand templates accessible across all projects.
- Uploads: Drag and drop your local files here. Canva supports PNG, JPEG, SVG, MP4, MOV, MP3, and standard document formats.
- Draw: Enables freehand sketching directly onto the canvas using customizable digital pens, highlighters, and color pickers.
- Apps: Extends Canva’s native capabilities by connecting tools such as Google Drive, Typeform, QR code generators, mockups, and AI-powered image expanders.
Canva Toolbar Explained: Dynamic Editing Controls
The white horizontal strip sitting between the top navigation bar and your canvas is the contextual toolbar. It remains dormant or minimal until you select an object on your canvas. The moment an element is clicked, this bar populates with relevant formatting options.
+---------------------------------------------------------------------------------------------------+
| CONTEXTUAL TOOLBAR EXAMPLES                                                                       |
+---------------------------------------------------------------------------------------------------+
| When Text Selected:    [Font Family v] [18px] [Color] [B] [I] [Align] [List] [Spacing] [Effects]  |
| When Image Selected:   [Edit photo] [Crop] [Flip] [Border] [Animate] [Position] [Transparency]    |
| When Shape Selected:   [Color] [Border Style] [Corner Rounding] [Animate] [Position]              |
+---------------------------------------------------------------------------------------------------+
1. Typography & Text Formatting Bar
When you select any text element, the toolbar displays:
- Font Family & Size Dropdowns: Choose typography styles or type precise point values.
- Color Swatch: Change text color using default swatches, Brand Kit palettes, or custom hex codes.
- Styling Controls: Bold (
B), Italic (I), Underline (U), Strikethrough, Uppercase toggle (aA), and Alignment (Left, Center, Right, Justified). - Lists & Spacing: Convert text into bulleted or numbered lists. Use the spacing tool to fine-tune letter-spacing (kerning) and line-height (leading).
- Effects: Add stylistic flair such as drop shadows, outlines (splice/hollow), neon glows, background highlight badges, or curved path distortions.
2. Element & Vector Toolbar
Selecting a vector shape or line surfaces:
- Color Pickers: Vector illustrations with multiple color fields will display separate swatches for each editable tone.
- Border Weight & Style: Add solid, dashed, or dotted stroke borders, adjust stroke thickness, and modify corner rounding radius on rectangles.
- Line Start/End Modifiers: Turn standard lines into arrows, endpoints, or geometric connectors with defined paths.
3. Global Positioning, Layering & Alignment
Present across all element selections on the far-right side of the toolbar:
- Position Menu: Provides automated alignment tools (Align to Page: Top, Left, Middle, Center, Bottom, Right) and distribution controls (Tidy Up, Space Evenly).
- Layers Panel: Switch to the Layers view within the Position menu to drag elements up or down the visual stack, lock background layers, or isolate overlapping objects.
- Transparency (Opacity Slider): Dial down element opacity from 100% to 0% for subtle background textures or watermarks.
- Lock Tool: Locks an element in place so it cannot be accidentally selected, moved, or deleted while editing surrounding content.
- Duplicate (
Ctrl/Cmd + D) & Delete: Instantly clone or remove selected canvas assets.
Canva Template Editing Guide: Step-by-Step Customization
Templates provide a structured foundation, but customizing them properly prevents your work from looking generic. Follow this systematic workflow to tailor any template to your needs:
+-----------------------------------------------------------------------------+
|                      TEMPLATE CUSTOMIZATION WORKFLOW                         |
|                                                                             |
|  1. Swap Visuals       2. Update Copy        3. Apply Colors   4. Align     |
|  [Drop Photos/Video] -> [Edit Typography] -> [Set Brand Hex] -> [Tidy Up]   |
+-----------------------------------------------------------------------------+
Step 1: Replace Stock Imagery and Video
Do not settle for generic stock photos included in the template. Go to Uploads or Elements > Photos, locate an image that represents your subject, and drag it directly over the existing photo container. Canva’s smart frames will automatically snap the new photo into place while preserving original mask dimensions.
Step 2: Customize Typography and Text Content
Double-click inside any text placeholder to edit the copy. Ensure your text hierarchy remains clear:
- Keep primary headlines prominent (large, bold font).
- Restrict body copy to clean, readable sans-serif or serif typefaces.
- Use the Copy Style tool (the paint roller icon on the toolbar) to quickly clone font size, weight, and color from one text block to another.
Step 3: Recolor Vectors and Backgrounds
Click the background canvas or any decorative vector element. Click the color swatch on the contextual toolbar and apply your chosen palette. If you want to replace a specific color across the entire design at once, look for the Change All prompt that appears at the bottom of the color picker panel.
Step 4: Refine Alignment and Spacing
Whenever you replace short placeholder text with longer real-world copy, layout elements may become misaligned. Select multiple related objects by holding Shift, open the Position menu, and select Tidy Up to evenly balance horizontal and vertical margins.
How to Edit Elements in Canva
A common question among beginners is: can you edit elements in Canva? The short answer is yes. Canva offers extensive control over vector graphics, geometric shapes, lines, and custom grouped objects.
+-----------------------------------------------------------------------------+
|                          VECTOR ELEMENT EDITING                             |
|                                                                             |
|  Original Asset       Color Swatches        Border Adjustments    Result    |
|   [ Graphic ]   -->   [ #1 ] [ #2 ]   -->   [--- Stroke Weight] -> [Custom] |
|   (Multicolor)        (Change Hexes)        (Corner Rounding)      (Graphic)|
+-----------------------------------------------------------------------------+
Editing Vector Graphics & Illustrations
When you place a graphic from the Elements tab onto your canvas:
- Click the graphic to check the top toolbar.
- If multiple colored square tiles appear, the graphic is an editable vector (SVG).
- Click any individual color tile to change that specific segment of the illustration to match your brand palette.
- If no color tiles appear, the asset is a static raster image rather than a vector. You can still apply tonal adjustments by clicking Edit Photo to modify contrast, saturation, or apply color filters.
Working with Grouped Elements
Many template components come grouped together (e.g., an icon paired with a headline and a subtext box).
- To edit an item within a group without breaking the arrangement, double-click directly on the specific sub-element.
- To separate the objects entirely, select the group and click Ungroup (
Ctrl/Cmd + Shift + G) on the contextual toolbar.
Canva Photo Editing Guide
You don’t need dedicated photo retouching software to adjust, crop, and enhance images. Selecting any image on your canvas and clicking Edit Photo opens a suite of adjustments and effects in the left panel.
+-----------------------------------------------------------------------------+
|                         CANVA PHOTO EDITING SUITE                           |
+--------------------------+-------------------------+------------------------+
| Basic Adjustments        | Creative Filters        | Studio Tools           |
+--------------------------+-------------------------+------------------------+
| - Exposure & Brightness  | - Duotone Color Maps    | - BG Remover (Pro)     |
| - Contrast & Highlights  | - Photogenic Presets    | - Magic Eraser (Pro)   |
| - Vibrance & Saturation  | - Blur Effects          | - Magic Grab & Expand  |
| - Sharpness & Clarity    | - Shadows & Reflections | - Auto-Enhance Tone    |
+--------------------------+-------------------------+------------------------+
1. Manual Color and Tone Adjustments
Under the Adjust tab, use precision sliders to correct lighting and color balance:
- Light: Fine-tune Exposure, Contrast, Highlights, Shadows, Whites, and Blacks to balance dynamic range.
- Color: Adjust Color Temperature (warm vs. cool balance), Tint, Vibrance, and Saturation.
- Texture: Increase Sharpness to bring out crisp lines, or boost Clarity to enhance mid-tone contrast.
2. Studio Effects and Enhancements
- Background Remover: Erases solid or complex backgrounds behind subjects with a single click.
- Magic Eraser: Brush over unwanted power lines, background clutter, or photobombers to seamlessly remove them from the scene.
- Magic Grab: Isolates the main subject from an image’s background, transforming the subject into a moveable, resizeable layer while leaving the background intact underneath.
- Shadows & Outlines: Add customizable drop shadows, floating shadows, or solid sticker outlines around cut-out product photos.
How to Edit Charts and Graphs in Canva
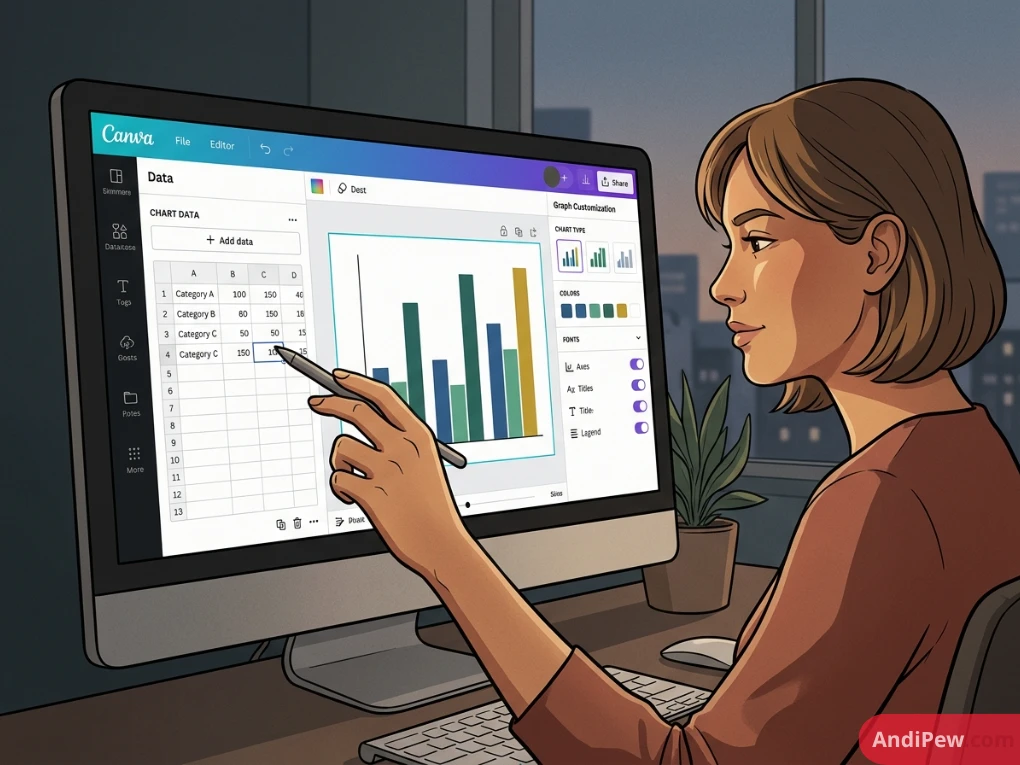
Visualizing data cleanly is critical for reports, pitch decks, infographics, and marketing collaterals. Knowing how to edit chart in canva allows you to turn raw spreadsheets into professional, interactive data graphics.
+-----------------------------------------------------------------------------+
|                        CHART EDITING INTERFACE                              |
|                                                                             |
|  [ Data Spreadsheet Panel ]          [ Rendered Canvas Graph ]              |
|  +------------------------+          |    80 |       ==                     |
|  | Item     | Value (USD) |          |    60 |   ==  ==                     |
|  |----------+-------------|   --->   |    40 |   ==  ==  ==                 |
|  | Q1 Sales | 45,000      |          |    20 |   ==  ==  ==  ==             |
|  | Q2 Sales | 68,000      |          |     0 +-----------------             |
|  | Q3 Sales | 52,000      |          |         Q1  Q2  Q3  Q4               |
|  +------------------------+          +--------------------------------------+
+-----------------------------------------------------------------------------+
Step-by-Step: Adding and Modifying Charts
- Open the Elements tab in the side panel, scroll down to Charts, and select your preferred format (Bar chart, Line graph, Donut chart, Pie chart, Scatter plot, or Funnel chart).
- Click the chart on your canvas. A data entry spreadsheet will slide open in the left panel.
- Manual Data Entry: Type your labels into Column A and numerical values into Column B. The chart on the canvas updates in real time.
- Google Sheets Sync: Click the Connect Google Sheets button at the bottom of the data panel to link a live spreadsheet, ensuring your graphics update automatically whenever your source figures change.
- CSV Upload: Click Upload CSV to import large datasets instantly without manual entry.
Customizing Graph Appearance
- Color Palette: Select the chart and use the top toolbar color tiles to apply specific brand colors to individual series or categories.
- Settings Toggle: Inside the chart panel, toggle options such as Show Labels, Show Legend, or adjust font sizes and number formatting (currency symbols, percentages).
Canva Video Editor Guide
Canva includes a full-featured video editing engine suitable for social reels, YouTube content, TikToks, and corporate video presentations.
+-----------------------------------------------------------------------------+
|                         VIDEO TIMELINE INTERFACE                            |
|                                                                             |
|  [ << ] [ Play / Pause ] [ >> ]               [ + Add Page / Split Clip ]   |
|  +-----------------------------------------------------------------------+  |
|  | [ Clip 1: Intro (0:04) ] >| [ Clip 2: Demo (0:08) ] >| [ Clip 3: CTA ]|  |
|  +-----------------------------------------------------------------------+  |
|  | [ Audio Track 1: Background Music (Fade-in applied)                 ] |  |
|  +-----------------------------------------------------------------------+  |
+-----------------------------------------------------------------------------+
1. The Multi-Track Timeline
When working inside a video format document, the bottom bar transforms into an interactive video timeline.
- Adding Clips: Drag video files from your Uploads or the Elements tab directly into timeline scenes.
- Trimming and Splitting: Hover your playhead (the vertical progress line) over the exact timestamp you wish to cut, right-click, and select Split Page (
S). Click and drag the outer edges of any clip to trim its duration. - Adding Transitions: Hover your cursor between any two video clips on the timeline until the
(+)icon appears. Click Add Transition to insert smooth animations like Dissolve, Slide, Wipe, Flow, or Line Color transitions.
2. Audio Editing and Sound Design
- Drag audio tracks onto the secondary audio lane beneath your video clips.
- Right-click the audio track to adjust volume levels, apply Audio Effects (Fade in / Fade out), or use the Beat Sync tool to automatically align visual cuts with the rhythm of your music track.
3. Layer Animations
To animate individual text overlays or graphics on top of your video footage, select the element and click Animate on the top toolbar. Choose from entry styles (Pan, Fade, Rise, Pop) or continuous path animations.

Canva Free vs. Canva Pro: Feature Comparison
While Canva’s free tier provides a capable toolkit for personal and occasional use, Canva Pro unlocks automated workflows, expansive asset libraries, and time-saving design utilities.
+----------------------------+-----------------------+------------------------+
| FEATURE / CAPABILITY       | CANVA FREE            | CANVA PRO              |
+----------------------------+-----------------------+------------------------+
| Stock Photo & Video Assets | ~1+ Million items     | 100+ Million items     |
| Cloud Storage Capacity     | 5 GB                  | 1 TB                   |
| Magic Switch & Resize      | Manual rebuilds only  | Instant multi-format   |
| Background Remover         | Not included          | One-click photo & vid  |
| Brand Kits                 | 1 palette (3 colors)  | Unlimited kits & fonts |
| Custom Font Uploads        | Unsupported           | Full TTF/OTF support   |
| Export Quality Options     | Standard JPG/PNG/PDF  | High-res, SVG, CMYK    |
| Transparent Backgrounds    | No (solid white fill) | Yes (PNG export)       |
| Version History            | Not accessible        | Full revision logs     |
+----------------------------+-----------------------+------------------------+
For a comprehensive breakdown of pricing structures, team licensing, and feature evaluations, consult our detailed canva free vs pro comparison guide.
Best Practices for Organizing and Exporting Your Files
Maintaining good document hygiene ensures your designs are easy to find, collaborate on, and export in the right format for digital or print distribution.
+-----------------------------------------------------------------------------+
|                         EXPORT FORMAT SELECTOR                              |
+-----------------+-----------------------------------------------------------+
| FORMAT          | BEST USE CASE                                             |
+-----------------+-----------------------------------------------------------+
| PNG             | Web graphics, social media posts, sharp text clarity.     |
| Transparent PNG | Logos, cut-out products, overlays, stickers (Pro).        |
| JPG             | Standard web photos, small file-size requirements.        |
| PDF Standard    | Digital documents, newsletters, multi-page lead magnets.  |
| PDF Print       | Commercial physical printing (select CMYK profile).       |
| MP4 Video       | Social reels, TikToks, video presentations, YouTube clips.|
| GIF             | Short looping animations without audio tracks.            |
| SVG             | Infinitely scalable vectors for web development (Pro).    |
+-----------------+-----------------------------------------------------------+
Exporting Your Final Work
- Click the Share button in the top right corner of the menu bar.
- Select Download from the dropdown menu.
- Choose the appropriate File Type based on your project’s destination (see reference table above).
- If you only need a specific page from a multi-page document, expand the Select Pages dropdown and check only the required page numbers.
- If creating a physical print item, check Crop marks and bleed under PDF Print settings to prevent white borders during commercial cutting.
- Click Download to save the rendered file directly to your local drive.
15 Essential Canva Keyboard Shortcuts
Using keyboard shortcuts speeds up your design workflow substantially. Keep these core combinations handy:
+-----------------------+--------------------------+--------------------------+
| ACTION                | WINDOWS SHORTCUT         | MAC SHORTCUT             |
+-----------------------+--------------------------+--------------------------+
| Add a Text Box        | T                        | T                        |
| Add a Rectangle       | R                        | R                        |
| Add a Circle          | C                        | C                        |
| Add a Line            | L                        | L                        |
| Duplicate Selected    | Ctrl + D                 | Cmd + D                  |
| Group Elements        | Ctrl + G                 | Cmd + G                  |
| Ungroup Elements      | Ctrl + Shift + G         | Cmd + Shift + G          |
| Bring Layer Forward   | Ctrl + ]                 | Cmd + ]                  |
| Send Layer Backward   | Ctrl + [                 | Cmd + [                  |
| Copy Element Style    | Ctrl + Alt + C           | Cmd + Option + C         |
| Paste Element Style   | Ctrl + Alt + V           | Cmd + Option + V         |
| Select All Elements   | Ctrl + A                 | Cmd + A                  |
| Toggle Rulers/Guides  | Shift + R                | Shift + R                |
| Split Video Clip      | S                        | S                        |
| Zoom In / Zoom Out    | Ctrl + (+) / Ctrl + (-)  | Cmd + (+) / Cmd + (-)    |
+-----------------------+--------------------------+--------------------------+
Frequently Asked Questions (FAQ)
What is the fastest way to learn the Canva editor interface?
The fastest way is to start with a premade template rather than a blank canvas. Practice swapping out photos, modifying font choices, changing color palettes, and arranging layers using the top contextual toolbar. Exploring our collection of canva tutorials will also help you master specific workflows step by step.
Can you edit elements in Canva after adding them to the canvas?
Yes. Vector illustrations allow you to change individual segment colors using the toolbar swatches. Static photos can be color-corrected, cropped, filtered, or stylized via the Edit Photo panel. Text boxes and shapes can have their dimensions, borders, and effects updated at any time.
How do I edit charts and graphs with live data in Canva?
Click on any chart inserted from the Elements tab. A spreadsheet panel will open on the left side of your screen. You can edit cells manually, paste tabular data, upload a CSV file, or link a live Google Sheet to update numbers automatically.
How do I save my Canva editing guide as a PDF?
Click the Share button in the top right corner, select Download, choose either PDF Standard (for digital distribution and email attachments) or PDF Print (for physical printing), select the pages you want to include, and click Download.
Can I edit video clips directly inside Canva?
Yes. Canva features a dedicated multi-track video timeline where you can split clips (S), trim durations, add visual transitions, insert text overlays, synchronize background music, and export high-definition MP4 files.
Conclusion
The Canva editor strikes an ideal balance between creative flexibility and user-friendly simplicity. By understanding how the top menu bar, left side panel, and contextual toolbar interact, you can approach any visual project—from marketing graphics and data presentations to video content—with total clarity.
Apply the foundational steps covered in this walkthrough to your next design. Customize your templates thoughtfully, maintain clean layer alignment, and make use of keyboard shortcuts to speed up your everyday production.
Ready to level up your graphic design skills? Explore our comprehensive library of canva tutorials to learn advanced animation techniques, master Brand Kit configurations, and streamline your creative workflow today.